Sunday, January 1, 2023

1st of 2023 with .Net and Angular 14 : Email Service for forgot password

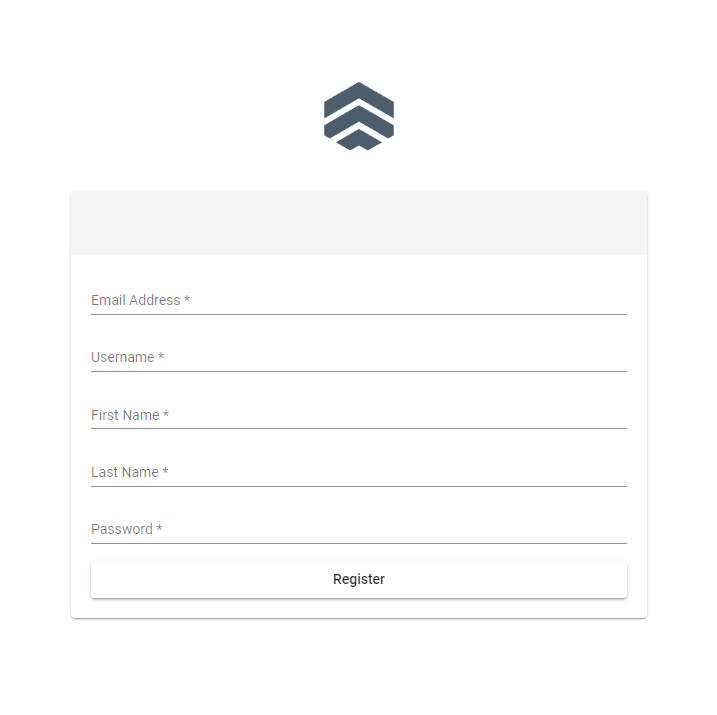
Not really  major push as I start the year. Development wise I'm able to piece parts of my project which are Registration, Forgot and Reset password.

They are actually basic features of any web applications so one should set it up as soon as you start the development process.


For local email I managed to use my existing localhost setup of Mailhog in my Docker component. Here's how it works for high level flow for reset password.

  • Allow user to post forgot password using their email
  • Generate password token and generate reset link 
  • Send reset password email to user
  • Allow user to submit new password

For the email functionality, here's what I did.
  • Added Email Service class
  • Add EmailConfigOptions class
  • Inject to Program.cs
  • Add email config to appsettings.json which will be loaded
  • Load the SMTP config to Program.cs

The Codes:

Here's my class for email.

 public class EmailService
    {
        private readonly EmailServiceOptions _options;

        public EmailService(EmailServiceOptions options)
        {
            _options = options;
        }

        public async Task SendEmailAsync(string recipient, string subject, string body)
        {
            using (var client = new SmtpClient(_options.SmtpServer, _options.SmtpPort))
            {
                client.UseDefaultCredentials = false;
                client.Credentials = new NetworkCredential(_options.SmtpUsername,_options.SmtpPassword);
                

                using (var message = new MailMessage())
                {
                    message.From = new MailAddress(_options.From);
                    message.To.Add(recipient);
                    message.Subject = subject;
                    message.Body = body;

                    await client.SendMailAsync(message);
                }
            }
        }
    }

The EmailServiceOptions model

    public class EmailServiceOptions
    {
        public string SmtpServer { get; set; } = string.Empty;
        public int SmtpPort { get; set; } = 1025;
        public string SmtpUsername { get; set; } = string.Empty;
        public string SmtpPassword { get; set; } = string.Empty;
        public string From{ get; set; } = string.Empty;
    }

Here's how I added to Program.cs

var emailOptions = builder.Configuration.GetSection("EmailService").Get<EmailServiceOptions>();

builder.Services.AddSingleton(emailOptions);

builder.Services.AddTransient<EmailService>();

For the appsettings.json I added properties below:

  "EmailService": {
    "From": "theemailgmail@gmail.com",
    "SmtpServer": "localhost",
    "SmtpPort": 1025,
    "SmtpUsername": "",
    "SmtpPassword": ""
  }


Now in my forgot-password

   [HttpPost("forgot-password")]
        public async Task<IActionResult> ForgotPassword(ForgotPasswordVM request)
        {
            // Validate request parameters
            if (!ModelState.IsValid)
            {
                return BadRequest(ModelState);
            }

            // Check if the provided email is registered
            var user = await _userManager.FindByEmailAsync(request.EmailAddress);
            if (user == null)
            {
                return BadRequest(new { message = "The provided email is not registered." });
            }

            // Generate a password reset token
            var token = await _userManager.GeneratePasswordResetTokenAsync(user);

            // Send the password reset email
            var resetUrl = $"{request.ResetUrl}?token={HttpUtility.UrlEncode(token)}&email={HttpUtility.UrlEncode(request.EmailAddress)}";

            await _emailService.SendEmailAsync(request.EmailAddress, "Password reset request", $"Please reset your password by following this link: {resetUrl}");

            return Ok();
        }

So how my smtp works? Basically I just run a Docker image Mailhog here

I won't cover setup of Docker Mailhog in this post but it's quite straightforward to follow the installation of it if you visit their site though.

Saturday, December 31, 2022

.Net Core Eager Loading related data.

As I continue playing around with .Net 6, I stumbled upon to its new feature which is to auto-include related data.

In most cases in app development, data are related and it requires to be included when you try to get the main entity. For instance you have a User table that has a related data to roles, you may want to include the user roles when you fetch the user/s. 

What I previously do is 

var results = await dbSet.Include(c => c.UserRoles).ToListAsync();

With the updates from Microsoft, Now I can add the code below in my DB Context

modelBuilder.Entity<User>().Navigation(e => e.UserRoles).AutoInclude();

That's my year-end post to remind my future self about this feature.

For reference please refer to link below.

https://learn.microsoft.com/en-us/ef/core/querying/related-data/eager#model-configuration-for-auto-including-navigations

Saturday, November 26, 2022

Ianemv Nov 26 & 27 Win Logs

 Angular 14

  • Setup Auth Guard 
  • Secured routes using auth guard

Dotnet

- Usage of Unit-of-Work

  • Creates a wrapper for all repositories so that only the wrapper will be injected to the Program.cs
  • Inject the wrapper to the controller and able to access the specific repository

Design Pattern using Java
  • Visitor Pattern implementation
  • Abstract Factory
  • Factory Pattern


Progress is progress no matter how small it is.


Friday, July 22, 2022

Note : Just bookmarking my .Net 6 journey of resources - July 23 notes

  •  EF Core for M1 : https://stackup.hashnode.dev/ef-migrations-visual-studio-mac
  • Ideally one DbContext for small app
  • To update the model or adding new field steps;
    • Add the field to the model definition
    • Create a migration using Add-Migration (VS), dotnet ef migrations NameOfMigration --context IfManyDBContext
    • Update database by using Update-Database (VS), dotnet ef database update


Will be updated too

Friday, March 18, 2022

Note : .Net 6 / C# Adding timestamp and user created modified to when saving data

As a Laravel user for quite sometime, it's quite easy for me to add User creator, modifier and timestamp for each model.

In the case of .Net 6 (or even earlier) it can be handled at DbContext and creating your base class that has the generic properties for the timestamps (created at, modified at) and user details (created_by / modified_by) 

using System.ComponentModel.DataAnnotations;

namespace YourApp.Models{

    public class BaseEntity

    {

        public DateTime DateCreated { get; set; }

        [Required]

        //id of the user created

        public string UserCreated { get; set; }

        public DateTime? DateModified { get; set; }

        [Required]

        //id of the user edited

        public string UserModified { get; set; }

    }

}


Below is my subclass using the super class BaseEntity

using System.ComponentModel.DataAnnotations;
using System.ComponentModel.DataAnnotations.Schema;

namespace YourApp.Models;

/*
 * Patient Model 
 */

public class MyCustomModel : BaseEntity
{
    [StringLength(125)]
    public string FirstName { get; set; }

    [StringLength(125)]
    public string LastName { get; set; }

    [StringLength(125)]
    public string Middlename { get; set; } = string.Empty;

}

So how to automatically do the timestamps and user details? I implemented the tutorial from the blog that I followed here. According to the blog, you can implement it at the override of your DbContext'  SaveChangesAsync.

My DbContext below. I highlighted from the code below the important parts where the magic happens.

using Microsoft.EntityFrameworkCore;
using YourApp.Models;
using System.Security.Claims;

namespace YourApp.Contexts
{
    public class DataContext : DbContext
{
private readonly IHttpContextAccessor _httpContextAccessor;
public DataContext(DbContextOptions <DataContext> options, IHttpContextAccessor httpContextAccessor) : base(options) 
{
_httpContextAccessor = httpContextAccessor;
}

        public DbSet<MyCustomModel > CustomModels{ get; set; }


        protected override void OnModelCreating(ModelBuilder builder)
        {
          base.OnModelCreating(builder);
        }


public override Task<int> SaveChangesAsync(CancellationToken cancellationToken = default)
{
var insertedEntries = this.ChangeTracker.Entries()
.Where(x => x.State == EntityState.Added)
.Select(x => x.Entity);
var userId = _httpContextAccessor.HttpContext.User.FindFirst(ClaimTypes.NameIdentifier).Value;
var currentUsername = !string.IsNullOrEmpty(userId)
? userId
: "Anonymous";

foreach (var insertedEntry in insertedEntries)
{
var auditableEntity = insertedEntry as BaseEntity;
//If the inserted object is an Auditable. 
if (auditableEntity != null)
{

auditableEntity.DateCreated = DateTime.Now;
auditableEntity.UserCreated = currentUsername;
auditableEntity.UserModified = currentUsername;
}
}
var modifiedEntries = this.ChangeTracker.Entries()
.Where(x => x.State == EntityState.Modified)
.Select(x => x.Entity);
foreach (var modifiedEntry in modifiedEntries)
{
//If the inserted object is an Auditable. 
var auditableEntity = modifiedEntry as BaseEntity;
if (auditableEntity != null)
{
auditableEntity.DateModified = DateTime.Now;
auditableEntity.UserModified = currentUsername;
}
}
return base.SaveChangesAsync(cancellationToken);
}

}
}


Aside from that, ensure also from your login that ClaimTypes.NameIdentifier is not empty

var userId = _httpContextAccessor.HttpContext.User.FindFirst(ClaimTypes.NameIdentifier).Value;

I set my value during login. See login method below.


    [HttpPost]
    [Route("login")]
    public async Task<IActionResult> Login([FromBody] UserLogin model)
    {
      var user = await _userManager.FindByNameAsync(model.Username);
      if (user != null && await _userManager.CheckPasswordAsync(user, model.Password))
      {
        var userRoles = await _userManager.GetRolesAsync(user);

        var authClaims = new List<Claim>
                {
                    new Claim(ClaimTypes.Name, user.UserName),
                    new Claim(ClaimTypes.NameIdentifier, user.Id),
                    new Claim(JwtRegisteredClaimNames.Jti, Guid.NewGuid().ToString()),
                };

        foreach (var userRole in userRoles)
        {
          authClaims.Add(new Claim(ClaimTypes.Role, userRole));
        }

        var token = GetToken(authClaims);

        return Ok(new
        {
          token = new JwtSecurityTokenHandler().WriteToken(token),
          expiration = token.ValidTo
        });
      }
      return Unauthorized();
    }


That pretty much of it. Hope that helps you too.

Tuesday, November 16, 2021

Macbook multiple git config for bitbucket

Bookmarking here how to have a multiple git account in Mac. Similarly, this would also work in Windows machine but it's okay not to have the last part that has UseKeychain part.

Use the config sample below which is found at ~/.ssh/config

Note: Refer to this link to generate rsa keys. 

Host bitbucket.org-user1

    Hostname bitbucket.org
    User git
    IdentityFile ~/.ssh/user_rsa (pub)
    IdentitiesOnly yes

Host bitbucket.org-another
    HostName bitbucket.org-ianemv
    User git
    IdentityFile ~/.ssh/id_rsa
    IdentitiesOnly yes

Host *
    UseKeychain yes
    AddKeysToAgent yes
    IdentityFile ~/.ssh/id_rsa
    IdentityFile ~/.ssh/user_rsa
Source here

On the title, I use bitbucket but this also applies to Github.
Additional resource here.

Thursday, January 28, 2021

Connecting SSH at Hostgator Shared Hosting

 Yes, you read it right! Hostgator. I know it's a bit of conventional but there are still small sites that uses shared hosting such as HostGator.

Anyway, how-to connecting SSH of HostgGator is just around the web and this post is basically my bookmark so I don't have to hunt around the web again.

Key points:

  • At cPanel account find SSH and Manage Keys
  • Add key. Private key usually created automatically.
  • Download Private Key (ppk format)
  • At Kitty / Putty (I'm using Windows) 
    • add host IP address
    • Private key at SSH
    • Set port 2222
  • Connect

Sources:

http://www.velvetblues.com/web-development-blog/configuring-ssh-secure-shell-on-hostgator/

https://www.youtube.com/watch?v=ZmvZy_bzzLs

That's it for now.