Sunday, January 1, 2023

1st of 2023 with .Net and Angular 14 : Email Service for forgot password

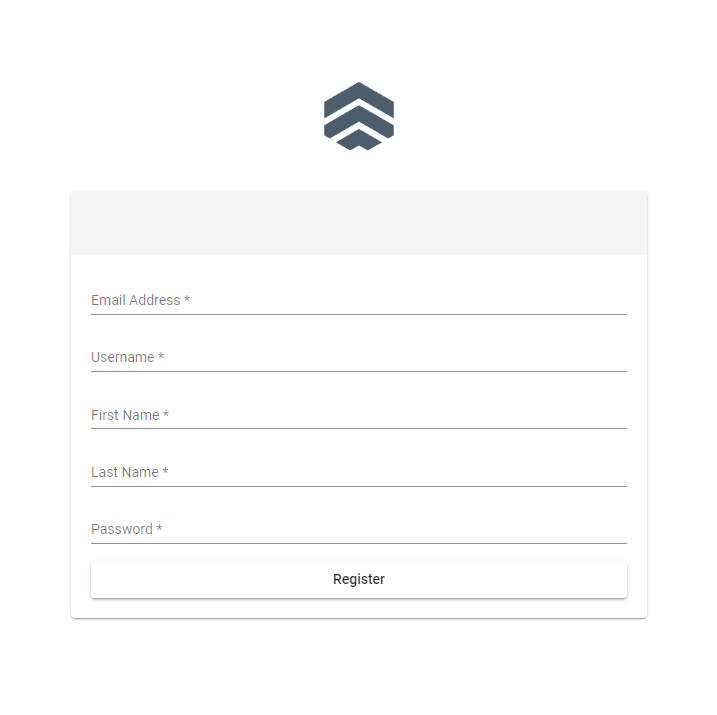
Not really  major push as I start the year. Development wise I'm able to piece parts of my project which are Registration, Forgot and Reset password.

They are actually basic features of any web applications so one should set it up as soon as you start the development process.

For local email I managed to use my existing localhost setup of Mailhog in my Docker component. Here's how it works for high level flow for reset password.

  • Allow user to post forgot password using their email
  • Generate password token and generate reset link 
  • Send reset password email to user
  • Allow user to submit new password

For the email functionality, here's what I did.
  • Added Email Service class
  • Add EmailConfigOptions class
  • Inject to Program.cs
  • Add email config to appsettings.json which will be loaded
  • Load the SMTP config to Program.cs

The Codes:

Here's my class for email.

 public class EmailService
    {
        private readonly EmailServiceOptions _options;

        public EmailService(EmailServiceOptions options)
        {
            _options = options;
        }

        public async Task SendEmailAsync(string recipient, string subject, string body)
        {
            using (var client = new SmtpClient(_options.SmtpServer, _options.SmtpPort))
            {
                client.UseDefaultCredentials = false;
                client.Credentials = new NetworkCredential(_options.SmtpUsername,_options.SmtpPassword);
                

                using (var message = new MailMessage())
                {
                    message.From = new MailAddress(_options.From);
                    message.To.Add(recipient);
                    message.Subject = subject;
                    message.Body = body;

                    await client.SendMailAsync(message);
                }
            }
        }
    }

The EmailServiceOptions model

    public class EmailServiceOptions
    {
        public string SmtpServer { get; set; } = string.Empty;
        public int SmtpPort { get; set; } = 1025;
        public string SmtpUsername { get; set; } = string.Empty;
        public string SmtpPassword { get; set; } = string.Empty;
        public string From{ get; set; } = string.Empty;
    }

Here's how I added to Program.cs

var emailOptions = builder.Configuration.GetSection("EmailService").Get<EmailServiceOptions>();

builder.Services.AddSingleton(emailOptions);

builder.Services.AddTransient<EmailService>();

For the appsettings.json I added properties below:

  "EmailService": {
    "From": "theemailgmail@gmail.com",
    "SmtpServer": "localhost",
    "SmtpPort": 1025,
    "SmtpUsername": "",
    "SmtpPassword": ""
  }


Now in my forgot-password

   [HttpPost("forgot-password")]
        public async Task<IActionResult> ForgotPassword(ForgotPasswordVM request)
        {
            // Validate request parameters
            if (!ModelState.IsValid)
            {
                return BadRequest(ModelState);
            }

            // Check if the provided email is registered
            var user = await _userManager.FindByEmailAsync(request.EmailAddress);
            if (user == null)
            {
                return BadRequest(new { message = "The provided email is not registered." });
            }

            // Generate a password reset token
            var token = await _userManager.GeneratePasswordResetTokenAsync(user);

            // Send the password reset email
            var resetUrl = $"{request.ResetUrl}?token={HttpUtility.UrlEncode(token)}&email={HttpUtility.UrlEncode(request.EmailAddress)}";

            await _emailService.SendEmailAsync(request.EmailAddress, "Password reset request", $"Please reset your password by following this link: {resetUrl}");

            return Ok();
        }

So how my smtp works? Basically I just run a Docker image Mailhog here. 

I won't cover setup of Docker Mailhog in this post but it's quite straightforward to follow the installation of it if you visit their site though.

Saturday, December 31, 2022

.Net Core Eager Loading related data.

As I continue playing around with .Net 6, I stumbled upon to its new feature which is to auto-include related data.

In most cases in app development, data are related and it requires to be included when you try to get the main entity. For instance you have a User table that has a related data to roles, you may want to include the user roles when you fetch the user/s. 

What I previously do is 

var results = await dbSet.Include(c => c.UserRoles).ToListAsync();

With the updates from Microsoft, Now I can add the code below in my DB Context

modelBuilder.Entity<User>().Navigation(e => e.UserRoles).AutoInclude();

That's my year-end post to remind my future self about this feature.

For reference please refer to link below.

https://learn.microsoft.com/en-us/ef/core/querying/related-data/eager#model-configuration-for-auto-including-navigations

Saturday, November 26, 2022

Ianemv Nov 26 & 27 Win Logs

 Angular 14

  • Setup Auth Guard 
  • Secured routes using auth guard

Dotnet

- Usage of Unit-of-Work

  • Creates a wrapper for all repositories so that only the wrapper will be injected to the Program.cs
  • Inject the wrapper to the controller and able to access the specific repository

Design Pattern using Java
  • Visitor Pattern implementation
  • Abstract Factory
  • Factory Pattern


Progress is progress no matter how small it is.


Friday, July 22, 2022

Note : Just bookmarking my .Net 6 journey of resources - July 23 notes

  •  EF Core for M1 : https://stackup.hashnode.dev/ef-migrations-visual-studio-mac
  • Ideally one DbContext for small app
  • To update the model or adding new field steps;
    • Add the field to the model definition
    • Create a migration using Add-Migration (VS), dotnet ef migrations NameOfMigration --context IfManyDBContext
    • Update database by using Update-Database (VS), dotnet ef database update


Will be updated too

Friday, March 18, 2022

Note : .Net 6 / C# Adding timestamp and user created modified to when saving data

As a Laravel user for quite sometime, it's quite easy for me to add User creator, modifier and timestamp for each model.

In the case of .Net 6 (or even earlier) it can be handled at DbContext and creating your base class that has the generic properties for the timestamps (created at, modified at) and user details (created_by / modified_by) 

using System.ComponentModel.DataAnnotations;

namespace YourApp.Models{

    public class BaseEntity

    {

        public DateTime DateCreated { get; set; }

        [Required]

        //id of the user created

        public string UserCreated { get; set; }

        public DateTime? DateModified { get; set; }

        [Required]

        //id of the user edited

        public string UserModified { get; set; }

    }

}


Below is my subclass using the super class BaseEntity

using System.ComponentModel.DataAnnotations;
using System.ComponentModel.DataAnnotations.Schema;

namespace YourApp.Models;

/*
 * Patient Model 
 */

public class MyCustomModel : BaseEntity
{
    [StringLength(125)]
    public string FirstName { get; set; }

    [StringLength(125)]
    public string LastName { get; set; }

    [StringLength(125)]
    public string Middlename { get; set; } = string.Empty;

}

So how to automatically do the timestamps and user details? I implemented the tutorial from the blog that I followed here. According to the blog, you can implement it at the override of your DbContext'  SaveChangesAsync.

My DbContext below. I highlighted from the code below the important parts where the magic happens.

using Microsoft.EntityFrameworkCore;
using YourApp.Models;
using System.Security.Claims;

namespace YourApp.Contexts
{
    public class DataContext : DbContext
{
private readonly IHttpContextAccessor _httpContextAccessor;
public DataContext(DbContextOptions <DataContext> options, IHttpContextAccessor httpContextAccessor) : base(options) 
{
_httpContextAccessor = httpContextAccessor;
}

        public DbSet<MyCustomModel > CustomModels{ get; set; }


        protected override void OnModelCreating(ModelBuilder builder)
        {
          base.OnModelCreating(builder);
        }


public override Task<int> SaveChangesAsync(CancellationToken cancellationToken = default)
{
var insertedEntries = this.ChangeTracker.Entries()
.Where(x => x.State == EntityState.Added)
.Select(x => x.Entity);
var userId = _httpContextAccessor.HttpContext.User.FindFirst(ClaimTypes.NameIdentifier).Value;
var currentUsername = !string.IsNullOrEmpty(userId)
? userId
: "Anonymous";

foreach (var insertedEntry in insertedEntries)
{
var auditableEntity = insertedEntry as BaseEntity;
//If the inserted object is an Auditable. 
if (auditableEntity != null)
{

auditableEntity.DateCreated = DateTime.Now;
auditableEntity.UserCreated = currentUsername;
auditableEntity.UserModified = currentUsername;
}
}
var modifiedEntries = this.ChangeTracker.Entries()
.Where(x => x.State == EntityState.Modified)
.Select(x => x.Entity);
foreach (var modifiedEntry in modifiedEntries)
{
//If the inserted object is an Auditable. 
var auditableEntity = modifiedEntry as BaseEntity;
if (auditableEntity != null)
{
auditableEntity.DateModified = DateTime.Now;
auditableEntity.UserModified = currentUsername;
}
}
return base.SaveChangesAsync(cancellationToken);
}

}
}


Aside from that, ensure also from your login that ClaimTypes.NameIdentifier is not empty

var userId = _httpContextAccessor.HttpContext.User.FindFirst(ClaimTypes.NameIdentifier).Value;

I set my value during login. See login method below.


    [HttpPost]
    [Route("login")]
    public async Task<IActionResult> Login([FromBody] UserLogin model)
    {
      var user = await _userManager.FindByNameAsync(model.Username);
      if (user != null && await _userManager.CheckPasswordAsync(user, model.Password))
      {
        var userRoles = await _userManager.GetRolesAsync(user);

        var authClaims = new List<Claim>
                {
                    new Claim(ClaimTypes.Name, user.UserName),
                    new Claim(ClaimTypes.NameIdentifier, user.Id),
                    new Claim(JwtRegisteredClaimNames.Jti, Guid.NewGuid().ToString()),
                };

        foreach (var userRole in userRoles)
        {
          authClaims.Add(new Claim(ClaimTypes.Role, userRole));
        }

        var token = GetToken(authClaims);

        return Ok(new
        {
          token = new JwtSecurityTokenHandler().WriteToken(token),
          expiration = token.ValidTo
        });
      }
      return Unauthorized();
    }


That pretty much of it. Hope that helps you too.

Tuesday, November 16, 2021

Macbook multiple git config for bitbucket

Bookmarking here how to have a multiple git account in Mac. Similarly, this would also work in Windows machine but it's okay not to have the last part that has UseKeychain part.

Use the config sample below which is found at ~/.ssh/config

Note: Refer to this link to generate rsa keys. 

Host bitbucket.org-user1

    Hostname bitbucket.org
    User git
    IdentityFile ~/.ssh/user_rsa (pub)
    IdentitiesOnly yes

Host bitbucket.org-another
    HostName bitbucket.org-ianemv
    User git
    IdentityFile ~/.ssh/id_rsa
    IdentitiesOnly yes

Host *
    UseKeychain yes
    AddKeysToAgent yes
    IdentityFile ~/.ssh/id_rsa
    IdentityFile ~/.ssh/user_rsa
Source here

On the title, I use bitbucket but this also applies to Github.
Additional resource here.

Thursday, January 28, 2021

Connecting SSH at Hostgator Shared Hosting

 Yes, you read it right! Hostgator. I know it's a bit of conventional but there are still small sites that uses shared hosting such as HostGator.

Anyway, how-to connecting SSH of HostgGator is just around the web and this post is basically my bookmark so I don't have to hunt around the web again.

Key points:

  • At cPanel account find SSH and Manage Keys
  • Add key. Private key usually created automatically.
  • Download Private Key (ppk format)
  • At Kitty / Putty (I'm using Windows) 
    • add host IP address
    • Private key at SSH
    • Set port 2222
  • Connect

Sources:

http://www.velvetblues.com/web-development-blog/configuring-ssh-secure-shell-on-hostgator/

https://www.youtube.com/watch?v=ZmvZy_bzzLs

That's it for now.

Sunday, April 12, 2020

April 6 - 12 Skills Challenge


New stuff learned for the days April 6 to 12, 2020. Quarantine days!


  • Single-SPA
  • Google Cloud Storage
  • Google Kubernetes
  • Google App Engine


Since I've been vacant for quite sometime now, I went to apply for a job last week and given a test challenge for the post. The challenge was to use Single-SPA javascript library. Basically, it's a library that can let you develop an app as microservices and you can use different JS framework or libraries such as VueJS, ReactJS, Vanilla or Angular.

It was cool, I thought it would be easy for me or just a walk in park, by reading the documents I was able to grasp the concept and how everything works. The goal for the challenge test was to learn how to develop an app with Single-SPA and its deployment process.

What I did was a single app approach but still implemented the split application somehow. I have a root config for the app that will load an application when user navigates to a given route. Though, the idea was to split the app by section, like footer, header, sidebar, styling and so on. The idea is to separate each section to have their own repo, which is very convenient for a large team. It's also ideal for migrating one section to another library without affecting the entire app.

Google Cloud Platform.

As I completed doing the basic setup of Single-SPA, it was time to deploy and test it on live site. Using the GCP for the deployment, I now learned how to use its Kubernetes product. And also learned how to use the built docker image, push to Google Container Registry and use it for cluster.

The flow will be

docker build .  ----> build the image
docker tag  --> tag the newly build
docker push  --> push to registry

docker tag <tag_name> <registry_name>/PROJECT_ID/<image_name>

[HOSTNAME] is listed under Location in the console.
It's one of four options: gcr.io, us.gcr.io, eu.gcr.io, or asia.gcr.io.
docker tag ceabfea5e26a gcr.io/boreal-totality-/single_spa_image:test
docker push [HOSTNAME]/[PROJECT-ID]/[IMAGE]
docker push gcr.io/boreal-totality-273505/single_spa_image


And for the last day of the week, April 12, I mostly spent time on Google App Engine and setup my local Kubernetes using minikube and kubectl. With Google App Engine, I just tried to setup a Laravel app. With Laravel requirements, I was able to use SQL service of GCP and have it connect to my Laravel app.

Flutter

My simple test application has been in long hiatus and finally, I was able to revisit and make it work again using the updated version. So I might be able to work on it next week. Btw, I've encountered an error with Flutter http module, I keep getting a 401 response with my login flow. With quick search for help, I found out that the post should have a headers with Content-Type of json

My code snippet would be like this now,

var response = await client.post('$login_path',
                            headers: {"Content-Type": "application/json"},
                            body: json.encode(form));

That's it for now.

StayHome StaySafe


Saturday, October 27, 2018

Note: Making React Native work

After moving my workspace from Windows 7 to Windows 10, I have so many things to do to make my small React Native (RN) project to run again.

I managed to make it run again by following RN's getting started  procedure. First test was to make the RN sample work.

Great! Everything works fine, I guess.

Problem started to come out as I started importing my files to the new project (react-native init AwesomeProject).  From the getting started page of RN, it says that you need to activate Android's building SDK tools version 26.0.3 but it actually throws errors. So, I activated both 28, 27 and 26 Android SDK Platforms. I would also test if I can deactivate the two and use the latest only which is 28. After that, I've encountered a lot of issues with the packages I'm using like react-redux, native-base,  redux-persist and others since I have to run npm install at least twice to successfully install the package.

When I finally make it run on android emulator, I noticed that native base's icons are not showing up. It'll show the [X] placeholder. Of course I forgot to follow the instruction that says run "react-native link" as discussed here. After making the assets linked, Another error spits out from the emulator which is Unable to load script from assets index.android.bundle on windows.  Good thing someone posted same question at StackOverflow and the solution is which I quoted below.

I've encountered the same issue while following the React Native tutorial (developing on Linux and targeting Android).
This issue helped me resolve the problem in following steps.
  1. (in project directory) mkdir android/app/src/main/assets
  1. react-native bundle --platform android --dev false --entry-file index.js --bundle-output android/app/src/main/assets/index.android.bundle --assets-dest android/app/src/main/res
  1. react-native run-android
You can automate the above steps by placing them in scripts part of package.json like this:
"android-linux": "react-native bundle --platform android --dev false --entry-file index.js --bundle-output android/app/src/main/assets/index.android.bundle --assets-dest android/app/src/main/res && react-native run-android"Then you can just execute npm run android-linux from your command line every time.
For now, my testing app is already working and I can continue from where I stopped before and on my new unit.

Wednesday, October 24, 2018

It's a hard Nuxt life

That following issues are needs to be address while

  • Running Nuxt with Node experiences crashes once in a while or very frequent
  • Make a static version (Nuxt generated version) of the live version (running on NodeJS)
  • Nuxt generated static html files for pages are not complete. Missing end tags for body and html.
DAY 1.

When I did the migration, my initial results that css files are not included at the production. Running at the development, all pages are working right with no hiccups. So weird? Well, I guess I'm really new at this stack.

My initial solution is take them piece by piece and of course get rid of jQuery. So many parts that uses jQuery and it's painful and it would take a lot of time, but for me, I think it's worth it. But we need it right away.

As they say, if there's a will there a way. 

Day 2

At first we were testing the results for SEO stuff at Google Webmasters' Fetch / Fetch and Render, every page is being cut off. For hours we thought it's coming from the CSS files. Take it off one by one including the plugins. Still the same!

Someone said there's an issue with asyncData method if using the static version of Nuxt. So, I created a simple test. Plain and simple pages, one page make a request from and API endpoint. asyncData not an issue.


Day 3

Found out that generated files are already cut-off or doesn't have a proper end tags for body and html. Problem could be during the compilation of js, css and everything. I update the Webpack version from 3 to 4. Ooops, there'a a lot of dependency issues. And so, Nuxt used was outdated so that could be one of the reasons. Maybe, just maybe. 

With a new create-nuxt-app, I started to import piece by piece. Suspected plugins are all working. What's happening? Generated pages are not being cut-off. It was going well. Then I completely migrated everything and did the "npm run dev". It's working!. I immediately ran "npm run generate" and deployed to my dev site. Damn! It has no styling. At least html are terminated pages. 

First solution. Use an external css. Now, it really works. It doesn't end there of course. I'm still having issues with the external css, font's were not loaded properly. So, I added an .htaccess file to allow it.

<FilesMatch "\.(ttf|otf|eot|woff)$">
    <IfModule mod_headers.c>
        SetEnvIf Origin "http(s)?://(www\.)?(anotherwebsite.com|cdn.anotherwebsite.com|blahblah.anotherwebsite.com)$" AccessControlAllowOrigin=$0
        Header add Access-Control-Allow-Origin %{AccessControlAllowOrigin}e env=AccessControlAllowOrigin
    </IfModule>
</FilesMatch>
Day 4

It's workable but seems to be tedious, when I'm going to deploy I have to do that first. Well, thanks to this deployment routine. By using Optimize CSS Assets Webpack Plugin and UglifyJS Webpack Plugin, css are extracted and included to the production or static files. Finally, after running the "npm run generate" and deploying it, css and fonts are included as static.

That's it for now. So many things to share but have a little time. 

Friday, July 13, 2018

Note : Using hidden for Laravel's model $append

Eloquent's mutator has been very helpful for making an additional attribute to a model. What is Eloquent mutator? According to Laravel's documentation, it says 

Accessors and mutators allow you to format Eloquent attribute values when you retrieve or set them on model instances.

Mutator is use along with an accessor, before accessor I usually use a method to return a custom field. For instance, I wanted my user model to return full name or lastname, firstname field. I would do the following


class User extends Model {
          public function fullname(){
                   return $this->firstname . " " . $this->lastname;
         }
}

My issue from above code is that I have to execute it each time I wanted to use it. Wouldn't it be nice if it's already attached along with your other attributes? How to do it?

Based on Laravel's documentation, accessor must be defined like a getter.

<?php
namespace App;
use Illuminate\Database\Eloquent\Model;
class User extends Model
{

    public function getFullNameAttribute()
    {
        return ucfirst($this->firstname) . " " . ucfirst($this->lastname);
    }

}
To attach it to the request just like the other attributes $appends property shall be added to the model.

The model will look something like this.
<?php 
namespace App; 
use Illuminate\Database\Eloquent\Model;
class User extends Model {
    protected $appends = array('fullname');
 
Since I'm using the append, mutators and accessors to a related table I noticed that related table will also be attached. Like in my post table, my post will have a user object attached into it. Check out the screenshot below. You will notice that user is attached to the post model. But I only wanted to append my custom field author.


Solutions:


  1. Add 'user' to the hidden property of the model and it will automatically hide the user object like this.
  2. Loop to the post collection and use the model method "makeHidden()". like this
           foreach($posts as $post){
                $post->makeHidden('user');
           }


And now the result will be something like this.

By using makeHidden, you can dynamically hide the mutator related table like user in my case. If it's in the hidden property of the model then it will not be in the attributes anymore. Unless the opposite  of makeHidden makeVisible method is use on the model.


Tuesday, July 10, 2018

Note: Fix on error BroadcastException in PusherBroadcaster.php line 106


While following a blog post on how to make a real-time Notification via Broadcasting using Pusher, it's expected to encounter some errors.

Basically I wanted to try how Laravel's Broadcasting works and use it in the future too. I didn't dwell on learning it before because some of the projects I worked with doesn't require a real-time updates. Though I've tested Firebase before but just testing if it connects to my Laravel App and nothing else. The fact that it was just a free trial account.

So today, I've finally tried a Pusher.com and Laravel's Broadcasting by following this blog. I though everything works but I noticed my Pusher's dashboard was not receiving any message at all.

The major error I've encountered is screenshot and copy-pasted below.

(1/1) BroadcastException in PusherBroadcaster.php line 106 at PusherBroadcaster->broadcast(array(object(PrivateChannel)), 'App\\Events\\MessageSent', array('user' => array('id' => 3, 'email' => 'meail@com.com', 'created_at' => '2018-06-23 08:50:41', 'updated_at' => '2018-06-23 08:50:41', 'firstname' => 'Ian', 'middlename' => null, 'lastname' => 'Villanueva', 'mobile_number' => null, 'status' => 0, 'birthdate' => null, 'address' => null, 'city_id' => null, 'country_id' => null, 'province_id' => null, 'profile_pic' => null, 'created_by' => null, 'updated_by' => null), 'message' => array('id' => 48, 'user_id' => 3, 'message' => 'coffee', 'created_at' => '2018-07-10 09:58:53', 'updated_at' => '2018-07-10 09:58:53'), 'socket' => null)) in BroadcastEvent.php line 49


As you can see above, there are no specific error to know how to fix it. Thanks to this Github discussion I was able to fixed it. And this for adding the ssl certificate to my localhost XAMMP.

Since, I got it working next up will be using it to ReactJS app and probably React Native later.


Monday, July 2, 2018

Putting validation rules at your models

Validation is one of the vital part of saving data coming from user. For instance you want to accept an email format but the user didn't supply the right data, that would be a disaster in a way, right?

Laravel's validation features has been there since the beginning but might as well use it. Basic usage of validation are as follows.

Include the Validator into your controller, in my case I like to use the following code snippet. 

$validator = Validator::make($request->all(),  [
        'title' => 'required|unique:posts|max:255',
        'body' => 'required',
    ]
);

          if ($validator->fails()) {
                    return response()->json([
                        'result' => $validator->messages(),
                        'message' => "Encountered validation error."
                    ], 400);

                  // redirect can also be put here.
            }

//code here if validation didn't fail


Code above starts by creating custom validation as stated from Laravel manual then checks if the validation failed. The creation of validation part can be repetitive in some cases and adding more conditions can be tricky since you have to look where controller did you use the rules.

I think it was from CakePHP that validation rules are put inside models so I applied similar thing.

In my models, I would put the following sample rules,

   protected static $rules = [
'title' => 'required|unique:posts|max:255',
'body' => 'required'
    ];

and a static function that basically returns the rules.

    public static function getRules() {
        return static::$rules;
    }

The in my controller's function, I would simply use

 $validator = Validator::make($input, Post::getRules());
Now, I can access or use my validation anywhere and update my rules in just one place which is the model.

In some cases, updating record is different from your create/new record rules so you can also put  the following function to your model

    public function getUpdateRules() {
        $updateRules = [];
        foreach(self::getRules() as $field => $rule) {
            $newRule = [];
            $ruleParts = explode('|',$rule);
            foreach($ruleParts as $part) {
                if(strpos($part,'unique:') === 0) {
                    if ( ! $this->isDirty($field)) {
                        $part = $part . ',' . $field . ',' . $this->getAttribute($field) . ',' . $field;
                    }
                }
                $newRule[] = $part;
            }
            $updateRules[$field] = join('|', $newRule);
        }
        return $updateRules;
    }

Credits: Found the code getUpdateRules function at StackOverflow.

That's it for now.


Saturday, October 14, 2017

Designing database for your Laravel Application

Laravel is one of the trending PHP frameworks for a couple years now. Most of its advantages and benefits are all said from the post I linked. From Laravel helpers, authentication tool, database migration and many more.

Of course, with the support of its community some developed a tool that to make the development even more faster.

Since most of the web / online systems development heavily involves database design, I would consider Laravel is second to none when it comes to its database tool. There's the migration and schema builder. It eases the database table creation and updates. If you are in a huge team, table design or updating are easily done by using migration tool.

On top of these tools, I personally recommend  Laravel Schema Designer website as part of database design. Laravel SD features helps its users to create, export and share your Laravel Schema. As a typical database design, you can design tables, add fields to it, add relationships to other tables. Since this is mainly for Laravel, the field type options such as nullable, fillable etc are all available. Here's a simple illustration I screenshot.


The best in all of this is the complete export which includes migration, controller, model with the relationships as designed like this.

namespace App;
use Illuminate\Database\Eloquent\Model;
class User extends Model
{
    protected $table = 'users';
    public $timestamps = true;
    public function role()
    {
        return $this->belongsToMany('Role');
    }
    public function attempts()
    {
        return $this->hasMany('Login_attempts');
    }
}
When all are set for your migrations, you can copy it to your laravel installation migration folder and execute the migration command to generate your schema. Some other files such as controllers are also available at php artisan commands so you might not need them anyway. In my case, I only use migration files.

That's what I can share for now.

I believe there are also other tools that is similar to the one I've posted. You can comment the tools you use in your Laravel development below.

Thursday, September 21, 2017

jQuery ajax post not working in Laravel 5.3

Here's the issue jQuery ajax post not working in Laravel 5.3 (could be occurring to other version too).

So here's the details, I created a jQuery ajax post to our Laravel backend. You might ask, why not just VueJS or other JS framework? Well, basically just a simple ajax request so why bother.

For a developer like me who immediately get his feet wet without reading in development, I would keep on trying until it'll work.

My jQuery code goes below:

      var request = $.post("/api/requestkoto",{
                data: {
                    'fieldOne': fieldOne,
                    'fieldTwo': fieldTwo,
                }
            });

For web developers, browser's developer console is their friend. It was pain in the ass to see that your request is not working. From the console the POST is turning to GET. I started to wonder and feeling lost. Where and Why it's happening?

 Tried using jQuery or $.

I also I tried disabling Larave's security by commenting out \App\Http\Middleware\VerifyCsrfToken::class, at HTTP/Kernel wherein my post started to work. Of course, it wasn't the solution.

Well, it turns out it's Laravel's security feature which states and can be found here.

In addition to checking for the CSRF token as a POST parameter, the VerifyCsrfToken middleware will also check for the X-CSRF-TOKEN request header. You could, for example, store the token in a HTML meta tag:

<meta name="csrf-token" content="{{ csrf_token() }}">
And you have to add this your code too.

$.ajaxSetup({
    headers: {
        'X-CSRF-TOKEN': $('meta[name="csrf-token"]').attr('content')
    }
});
So with that, I my new ajax POST request would be

      var request = $.post("/api/requestkoto",{
                data: {
                     '_token': window.Laravel.csrfToken, 'fieldOne': fieldOne,
                    'fieldTwo': fieldTwo,
                }
            });
I just added  '_token': window.Laravel.csrfToken to the request and everything works as expected. Spent more than 1 hour tracing from backend to javascript.

Okay. That's it for now.

Welcome to PH Devlog

Hi!

I'm a Web Developer from Philippines and I just created this blog to serve as my logs on web development.

This could be a log of simple or even complex issues that I encountered during the development process. Creation of this blog has been in my mind for quite a long time now but today I decided to start it.

So that's it for now.

Ciao!

- ian v