Friday, July 22, 2022

Note : Just bookmarking my .Net 6 journey of resources - July 23 notes

  •  EF Core for M1 : https://stackup.hashnode.dev/ef-migrations-visual-studio-mac
  • Ideally one DbContext for small app
  • To update the model or adding new field steps;
    • Add the field to the model definition
    • Create a migration using Add-Migration (VS), dotnet ef migrations NameOfMigration --context IfManyDBContext
    • Update database by using Update-Database (VS), dotnet ef database update


Will be updated too

Friday, March 18, 2022

Note : .Net 6 / C# Adding timestamp and user created modified to when saving data

As a Laravel user for quite sometime, it's quite easy for me to add User creator, modifier and timestamp for each model.

In the case of .Net 6 (or even earlier) it can be handled at DbContext and creating your base class that has the generic properties for the timestamps (created at, modified at) and user details (created_by / modified_by) 

using System.ComponentModel.DataAnnotations;

namespace YourApp.Models{

    public class BaseEntity

    {

        public DateTime DateCreated { get; set; }

        [Required]

        //id of the user created

        public string UserCreated { get; set; }

        public DateTime? DateModified { get; set; }

        [Required]

        //id of the user edited

        public string UserModified { get; set; }

    }

}


Below is my subclass using the super class BaseEntity

using System.ComponentModel.DataAnnotations;
using System.ComponentModel.DataAnnotations.Schema;

namespace YourApp.Models;

/*
 * Patient Model 
 */

public class MyCustomModel : BaseEntity
{
    [StringLength(125)]
    public string FirstName { get; set; }

    [StringLength(125)]
    public string LastName { get; set; }

    [StringLength(125)]
    public string Middlename { get; set; } = string.Empty;

}

So how to automatically do the timestamps and user details? I implemented the tutorial from the blog that I followed here. According to the blog, you can implement it at the override of your DbContext'  SaveChangesAsync.

My DbContext below. I highlighted from the code below the important parts where the magic happens.

using Microsoft.EntityFrameworkCore;
using YourApp.Models;
using System.Security.Claims;

namespace YourApp.Contexts
{
    public class DataContext : DbContext
{
private readonly IHttpContextAccessor _httpContextAccessor;
public DataContext(DbContextOptions <DataContext> options, IHttpContextAccessor httpContextAccessor) : base(options) 
{
_httpContextAccessor = httpContextAccessor;
}

        public DbSet<MyCustomModel > CustomModels{ get; set; }


        protected override void OnModelCreating(ModelBuilder builder)
        {
          base.OnModelCreating(builder);
        }


public override Task<int> SaveChangesAsync(CancellationToken cancellationToken = default)
{
var insertedEntries = this.ChangeTracker.Entries()
.Where(x => x.State == EntityState.Added)
.Select(x => x.Entity);
var userId = _httpContextAccessor.HttpContext.User.FindFirst(ClaimTypes.NameIdentifier).Value;
var currentUsername = !string.IsNullOrEmpty(userId)
? userId
: "Anonymous";

foreach (var insertedEntry in insertedEntries)
{
var auditableEntity = insertedEntry as BaseEntity;
//If the inserted object is an Auditable. 
if (auditableEntity != null)
{

auditableEntity.DateCreated = DateTime.Now;
auditableEntity.UserCreated = currentUsername;
auditableEntity.UserModified = currentUsername;
}
}
var modifiedEntries = this.ChangeTracker.Entries()
.Where(x => x.State == EntityState.Modified)
.Select(x => x.Entity);
foreach (var modifiedEntry in modifiedEntries)
{
//If the inserted object is an Auditable. 
var auditableEntity = modifiedEntry as BaseEntity;
if (auditableEntity != null)
{
auditableEntity.DateModified = DateTime.Now;
auditableEntity.UserModified = currentUsername;
}
}
return base.SaveChangesAsync(cancellationToken);
}

}
}


Aside from that, ensure also from your login that ClaimTypes.NameIdentifier is not empty

var userId = _httpContextAccessor.HttpContext.User.FindFirst(ClaimTypes.NameIdentifier).Value;

I set my value during login. See login method below.


    [HttpPost]
    [Route("login")]
    public async Task<IActionResult> Login([FromBody] UserLogin model)
    {
      var user = await _userManager.FindByNameAsync(model.Username);
      if (user != null && await _userManager.CheckPasswordAsync(user, model.Password))
      {
        var userRoles = await _userManager.GetRolesAsync(user);

        var authClaims = new List<Claim>
                {
                    new Claim(ClaimTypes.Name, user.UserName),
                    new Claim(ClaimTypes.NameIdentifier, user.Id),
                    new Claim(JwtRegisteredClaimNames.Jti, Guid.NewGuid().ToString()),
                };

        foreach (var userRole in userRoles)
        {
          authClaims.Add(new Claim(ClaimTypes.Role, userRole));
        }

        var token = GetToken(authClaims);

        return Ok(new
        {
          token = new JwtSecurityTokenHandler().WriteToken(token),
          expiration = token.ValidTo
        });
      }
      return Unauthorized();
    }


That pretty much of it. Hope that helps you too.
Tuesday, November 16, 2021

Macbook multiple git config for bitbucket

Bookmarking here how to have a multiple git account in Mac. Similarly, this would also work in Windows machine but it's okay not to have the last part that has UseKeychain part.

Use the config sample below which is found at ~/.ssh/config

Note: Refer to this link to generate rsa keys. 

Host bitbucket.org-user1

    Hostname bitbucket.org
    User git
    IdentityFile ~/.ssh/user_rsa (pub)
    IdentitiesOnly yes

Host bitbucket.org-another
    HostName bitbucket.org-ianemv
    User git
    IdentityFile ~/.ssh/id_rsa
    IdentitiesOnly yes

Host *
    UseKeychain yes
    AddKeysToAgent yes
    IdentityFile ~/.ssh/id_rsa
    IdentityFile ~/.ssh/user_rsa
Source here

On the title, I use bitbucket but this also applies to Github.
Additional resource here.

Thursday, January 28, 2021

Connecting SSH at Hostgator Shared Hosting

 Yes, you read it right! Hostgator. I know it's a bit of conventional but there are still small sites that uses shared hosting such as HostGator.

Anyway, how-to connecting SSH of HostgGator is just around the web and this post is basically my bookmark so I don't have to hunt around the web again.

Key points:

  • At cPanel account find SSH and Manage Keys
  • Add key. Private key usually created automatically.
  • Download Private Key (ppk format)
  • At Kitty / Putty (I'm using Windows) 
    • add host IP address
    • Private key at SSH
    • Set port 2222
  • Connect

Sources:

http://www.velvetblues.com/web-development-blog/configuring-ssh-secure-shell-on-hostgator/

https://www.youtube.com/watch?v=ZmvZy_bzzLs

That's it for now.

Sunday, April 12, 2020

April 6 - 12 Skills Challenge


New stuff learned for the days April 6 to 12, 2020. Quarantine days!


  • Single-SPA
  • Google Cloud Storage
  • Google Kubernetes
  • Google App Engine


Since I've been vacant for quite sometime now, I went to apply for a job last week and given a test challenge for the post. The challenge was to use Single-SPA javascript library. Basically, it's a library that can let you develop an app as microservices and you can use different JS framework or libraries such as VueJS, ReactJS, Vanilla or Angular.

It was cool, I thought it would be easy for me or just a walk in park, by reading the documents I was able to grasp the concept and how everything works. The goal for the challenge test was to learn how to develop an app with Single-SPA and its deployment process.

What I did was a single app approach but still implemented the split application somehow. I have a root config for the app that will load an application when user navigates to a given route. Though, the idea was to split the app by section, like footer, header, sidebar, styling and so on. The idea is to separate each section to have their own repo, which is very convenient for a large team. It's also ideal for migrating one section to another library without affecting the entire app.

Google Cloud Platform.

As I completed doing the basic setup of Single-SPA, it was time to deploy and test it on live site. Using the GCP for the deployment, I now learned how to use its Kubernetes product. And also learned how to use the built docker image, push to Google Container Registry and use it for cluster.

The flow will be

docker build .  ----> build the image
docker tag  --> tag the newly build
docker push  --> push to registry

docker tag <tag_name> <registry_name>/PROJECT_ID/<image_name>

[HOSTNAME] is listed under Location in the console.
It's one of four options: gcr.io, us.gcr.io, eu.gcr.io, or asia.gcr.io.
docker tag ceabfea5e26a gcr.io/boreal-totality-/single_spa_image:test
docker push [HOSTNAME]/[PROJECT-ID]/[IMAGE]
docker push gcr.io/boreal-totality-273505/single_spa_image


And for the last day of the week, April 12, I mostly spent time on Google App Engine and setup my local Kubernetes using minikube and kubectl. With Google App Engine, I just tried to setup a Laravel app. With Laravel requirements, I was able to use SQL service of GCP and have it connect to my Laravel app.

Flutter

My simple test application has been in long hiatus and finally, I was able to revisit and make it work again using the updated version. So I might be able to work on it next week. Btw, I've encountered an error with Flutter http module, I keep getting a 401 response with my login flow. With quick search for help, I found out that the post should have a headers with Content-Type of json

My code snippet would be like this now,

var response = await client.post('$login_path',
                            headers: {"Content-Type": "application/json"},
                            body: json.encode(form));

That's it for now.

StayHome StaySafe


Saturday, October 27, 2018

Note: Making React Native work

After moving my workspace from Windows 7 to Windows 10, I have so many things to do to make my small React Native (RN) project to run again.

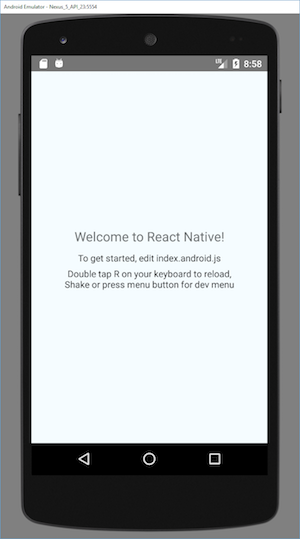
I managed to make it run again by following RN's getting started  procedure. First test was to make the RN sample work.

Great! Everything works fine, I guess.

Problem started to come out as I started importing my files to the new project (react-native init AwesomeProject).  From the getting started page of RN, it says that you need to activate Android's building SDK tools version 26.0.3 but it actually throws errors. So, I activated both 28, 27 and 26 Android SDK Platforms. I would also test if I can deactivate the two and use the latest only which is 28. After that, I've encountered a lot of issues with the packages I'm using like react-redux, native-base,  redux-persist and others since I have to run npm install at least twice to successfully install the package.

When I finally make it run on android emulator, I noticed that native base's icons are not showing up. It'll show the [X] placeholder. Of course I forgot to follow the instruction that says run "react-native link" as discussed here. After making the assets linked, Another error spits out from the emulator which is Unable to load script from assets index.android.bundle on windows.  Good thing someone posted same question at StackOverflow and the solution is which I quoted below.

I've encountered the same issue while following the React Native tutorial (developing on Linux and targeting Android).
This issue helped me resolve the problem in following steps.
  1. (in project directory) mkdir android/app/src/main/assets
  1. react-native bundle --platform android --dev false --entry-file index.js --bundle-output android/app/src/main/assets/index.android.bundle --assets-dest android/app/src/main/res
  1. react-native run-android
You can automate the above steps by placing them in scripts part of package.json like this:
"android-linux": "react-native bundle --platform android --dev false --entry-file index.js --bundle-output android/app/src/main/assets/index.android.bundle --assets-dest android/app/src/main/res && react-native run-android"Then you can just execute npm run android-linux from your command line every time.
For now, my testing app is already working and I can continue from where I stopped before and on my new unit.

Wednesday, October 24, 2018

It's a hard Nuxt life

That following issues are needs to be address while

  • Running Nuxt with Node experiences crashes once in a while or very frequent
  • Make a static version (Nuxt generated version) of the live version (running on NodeJS)
  • Nuxt generated static html files for pages are not complete. Missing end tags for body and html.
DAY 1.

When I did the migration, my initial results that css files are not included at the production. Running at the development, all pages are working right with no hiccups. So weird? Well, I guess I'm really new at this stack.

My initial solution is take them piece by piece and of course get rid of jQuery. So many parts that uses jQuery and it's painful and it would take a lot of time, but for me, I think it's worth it. But we need it right away.

As they say, if there's a will there a way. 

Day 2

At first we were testing the results for SEO stuff at Google Webmasters' Fetch / Fetch and Render, every page is being cut off. For hours we thought it's coming from the CSS files. Take it off one by one including the plugins. Still the same!

Someone said there's an issue with asyncData method if using the static version of Nuxt. So, I created a simple test. Plain and simple pages, one page make a request from and API endpoint. asyncData not an issue.


Day 3

Found out that generated files are already cut-off or doesn't have a proper end tags for body and html. Problem could be during the compilation of js, css and everything. I update the Webpack version from 3 to 4. Ooops, there'a a lot of dependency issues. And so, Nuxt used was outdated so that could be one of the reasons. Maybe, just maybe. 

With a new create-nuxt-app, I started to import piece by piece. Suspected plugins are all working. What's happening? Generated pages are not being cut-off. It was going well. Then I completely migrated everything and did the "npm run dev". It's working!. I immediately ran "npm run generate" and deployed to my dev site. Damn! It has no styling. At least html are terminated pages. 

First solution. Use an external css. Now, it really works. It doesn't end there of course. I'm still having issues with the external css, font's were not loaded properly. So, I added an .htaccess file to allow it.

<FilesMatch "\.(ttf|otf|eot|woff)$">
    <IfModule mod_headers.c>
        SetEnvIf Origin "http(s)?://(www\.)?(anotherwebsite.com|cdn.anotherwebsite.com|blahblah.anotherwebsite.com)$" AccessControlAllowOrigin=$0
        Header add Access-Control-Allow-Origin %{AccessControlAllowOrigin}e env=AccessControlAllowOrigin
    </IfModule>
</FilesMatch>
Day 4

It's workable but seems to be tedious, when I'm going to deploy I have to do that first. Well, thanks to this deployment routine. By using Optimize CSS Assets Webpack Plugin and UglifyJS Webpack Plugin, css are extracted and included to the production or static files. Finally, after running the "npm run generate" and deploying it, css and fonts are included as static.

That's it for now. So many things to share but have a little time.